
This'll come as a relief for anybody who's read the Amanda and Pableu pages: Sunny is mostly copied from a book like Amanda so there's not going to be much writing here.
Since making Amanda and Pableu, I've been on the lookout for more cuddly toy making books. (Not that I wasn't looking for them before, but it's only now I feel like I'm finding anything good.)
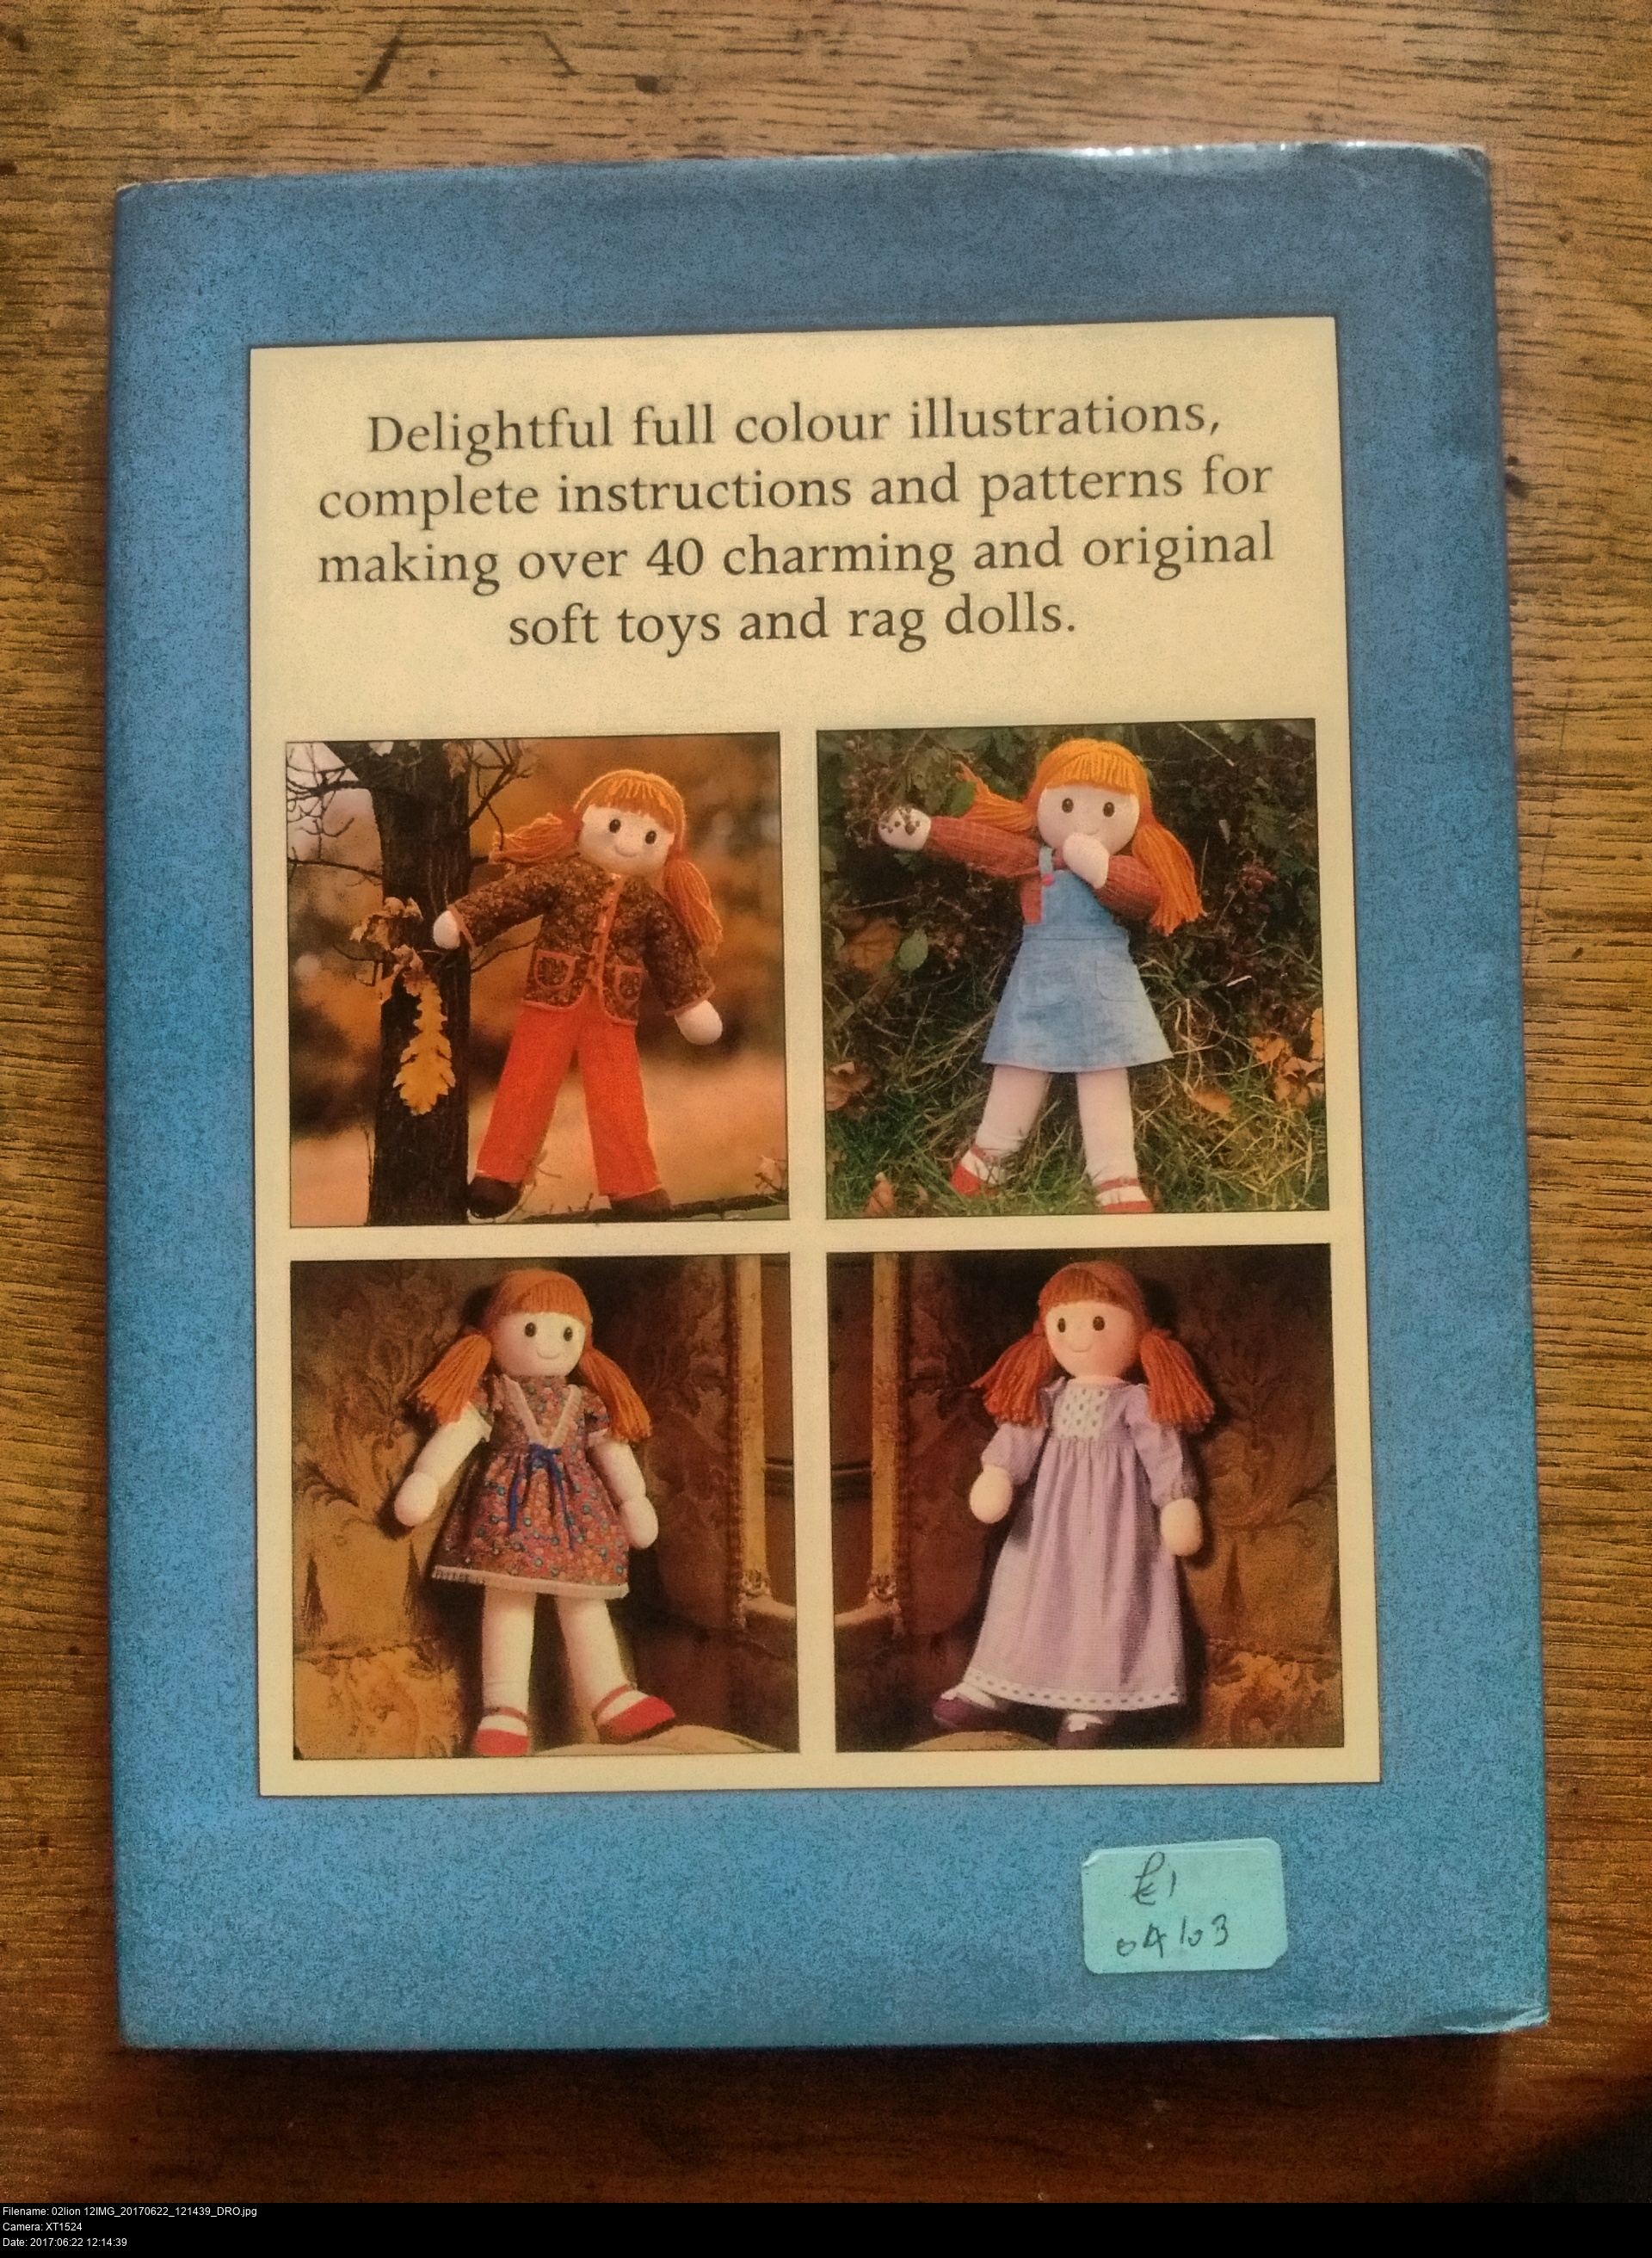
This is Cuddly Toys and Dolls by Jean Greenhowe from 1982, with an intricately made and ghastly to look at Humpty Dumpty on the cover. It's got lots of rag dolls on the back cover. I have a suspicion. Or rather two:
The author is a little frustrated that their publisher asked them to edit a book about other kinds of toys that interest them less when their real passion is dolls.
The author likes dolls and other stuffed toys equally, but dolls sell books, so on the back cover dolls is what you're going to get.

It's got small toys, large toys and sit-upon toys ! Why make a tiny little ladybird when you can make something big and cuddly?
And what could possibly be more big and cuddly...


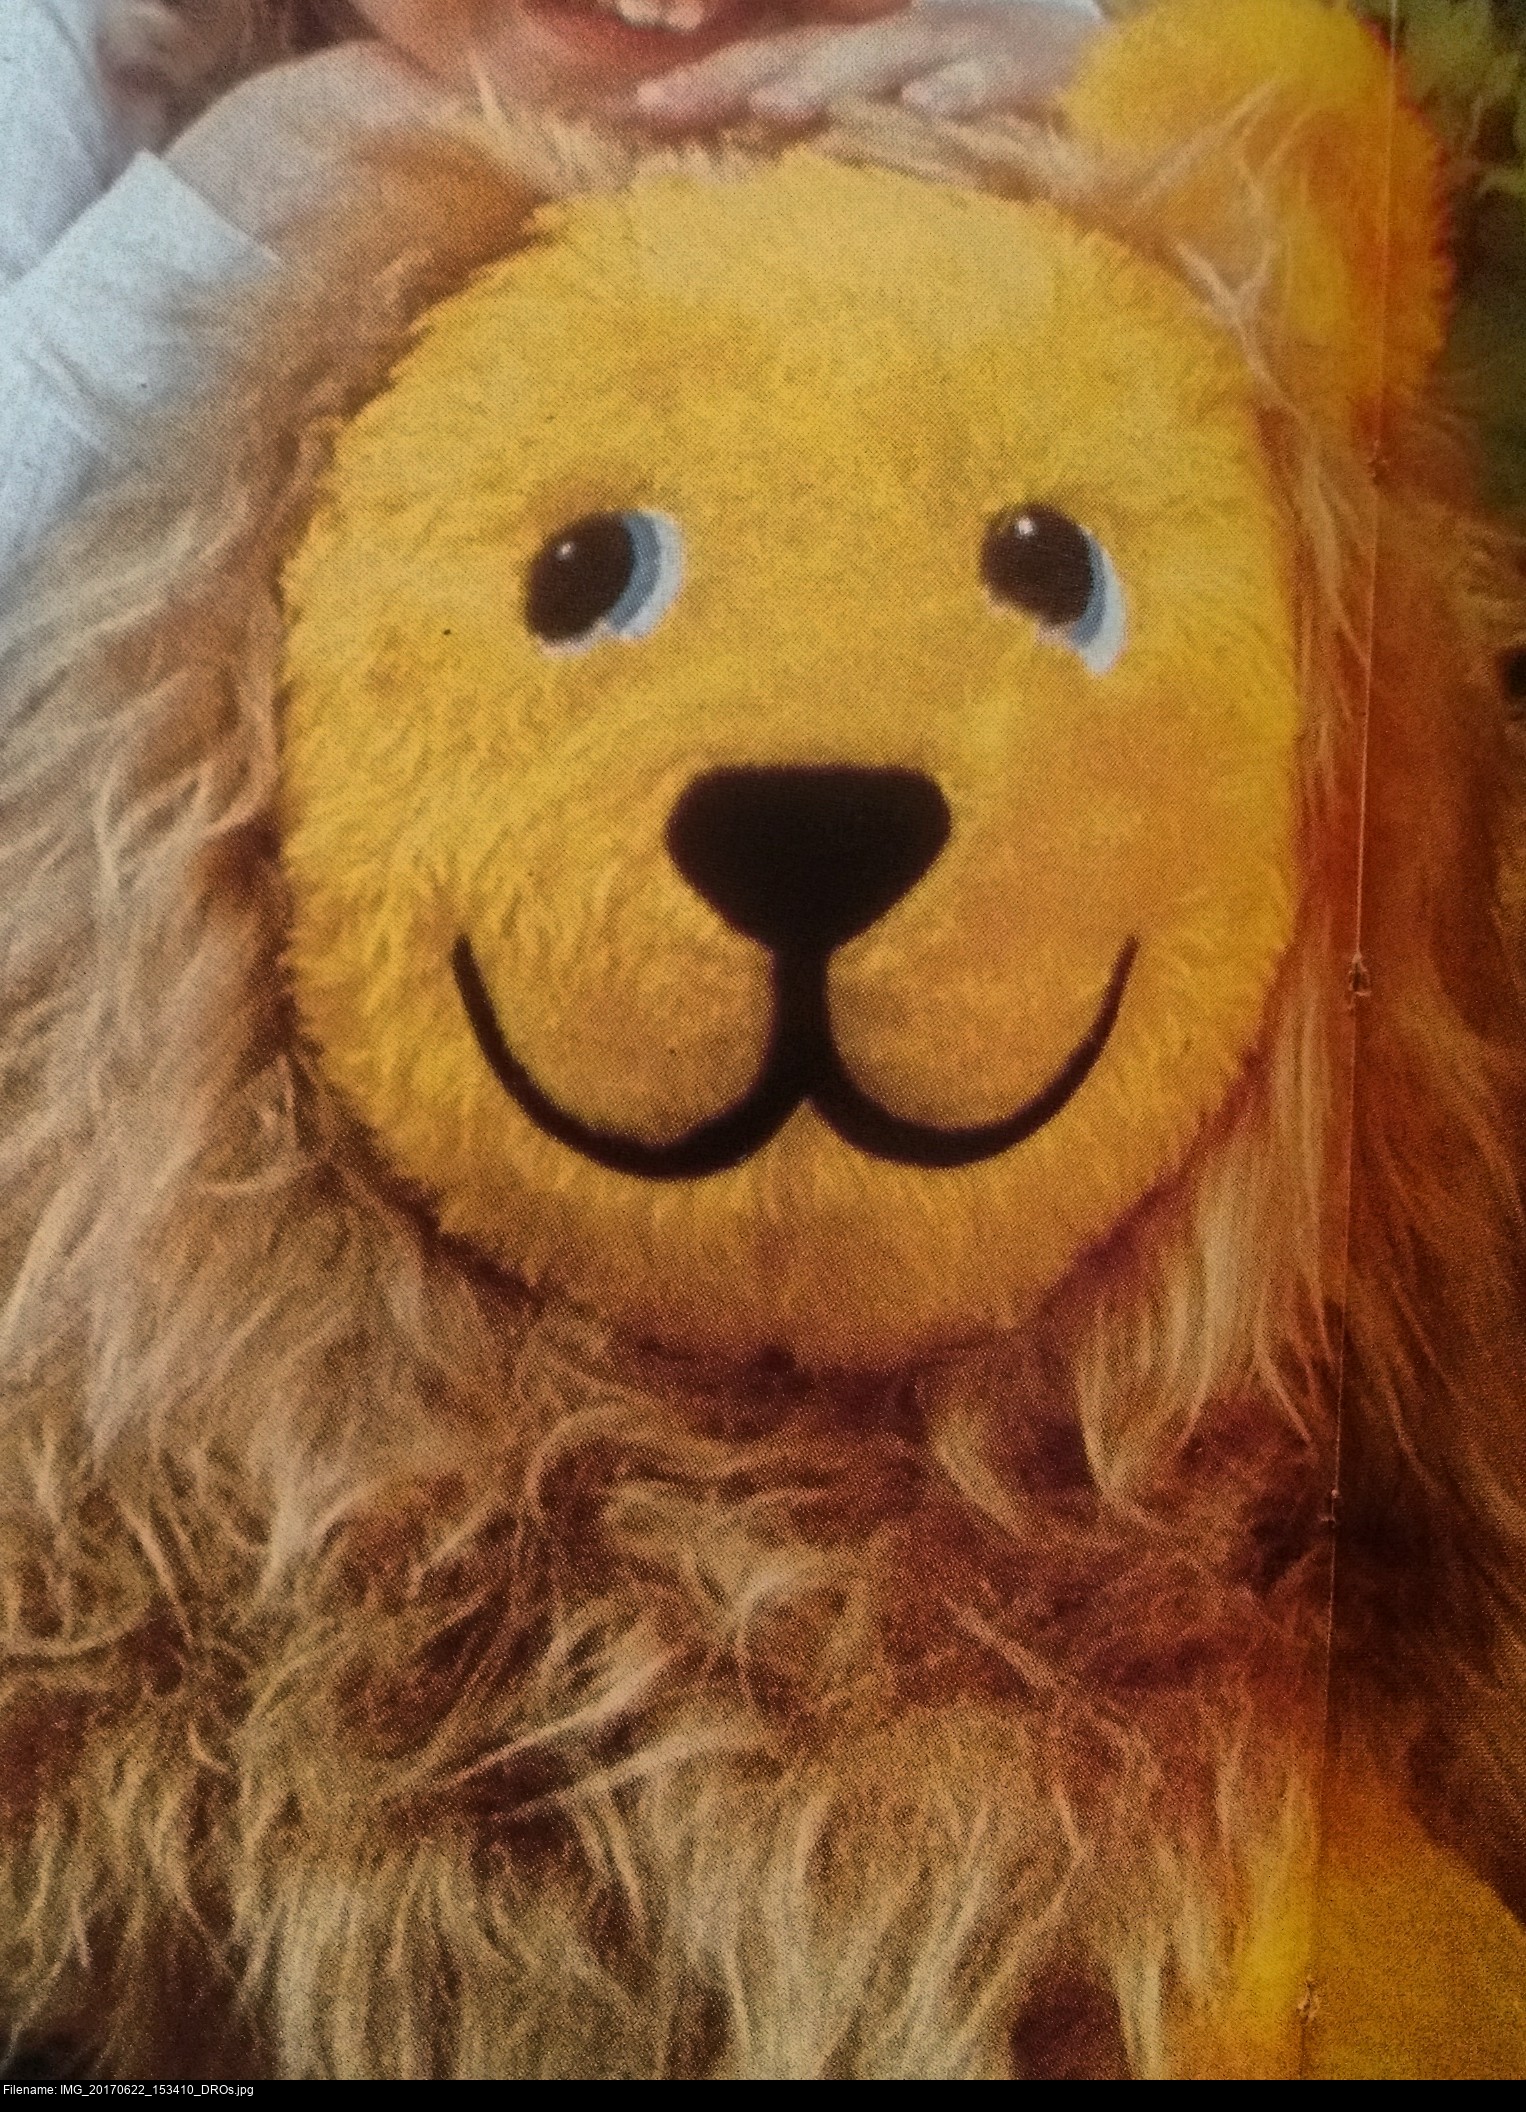
Than a massive super-happy lion !
How could you say no to that face? And how on Earth did they sew those lovely clean lines for his mouth and his paws?

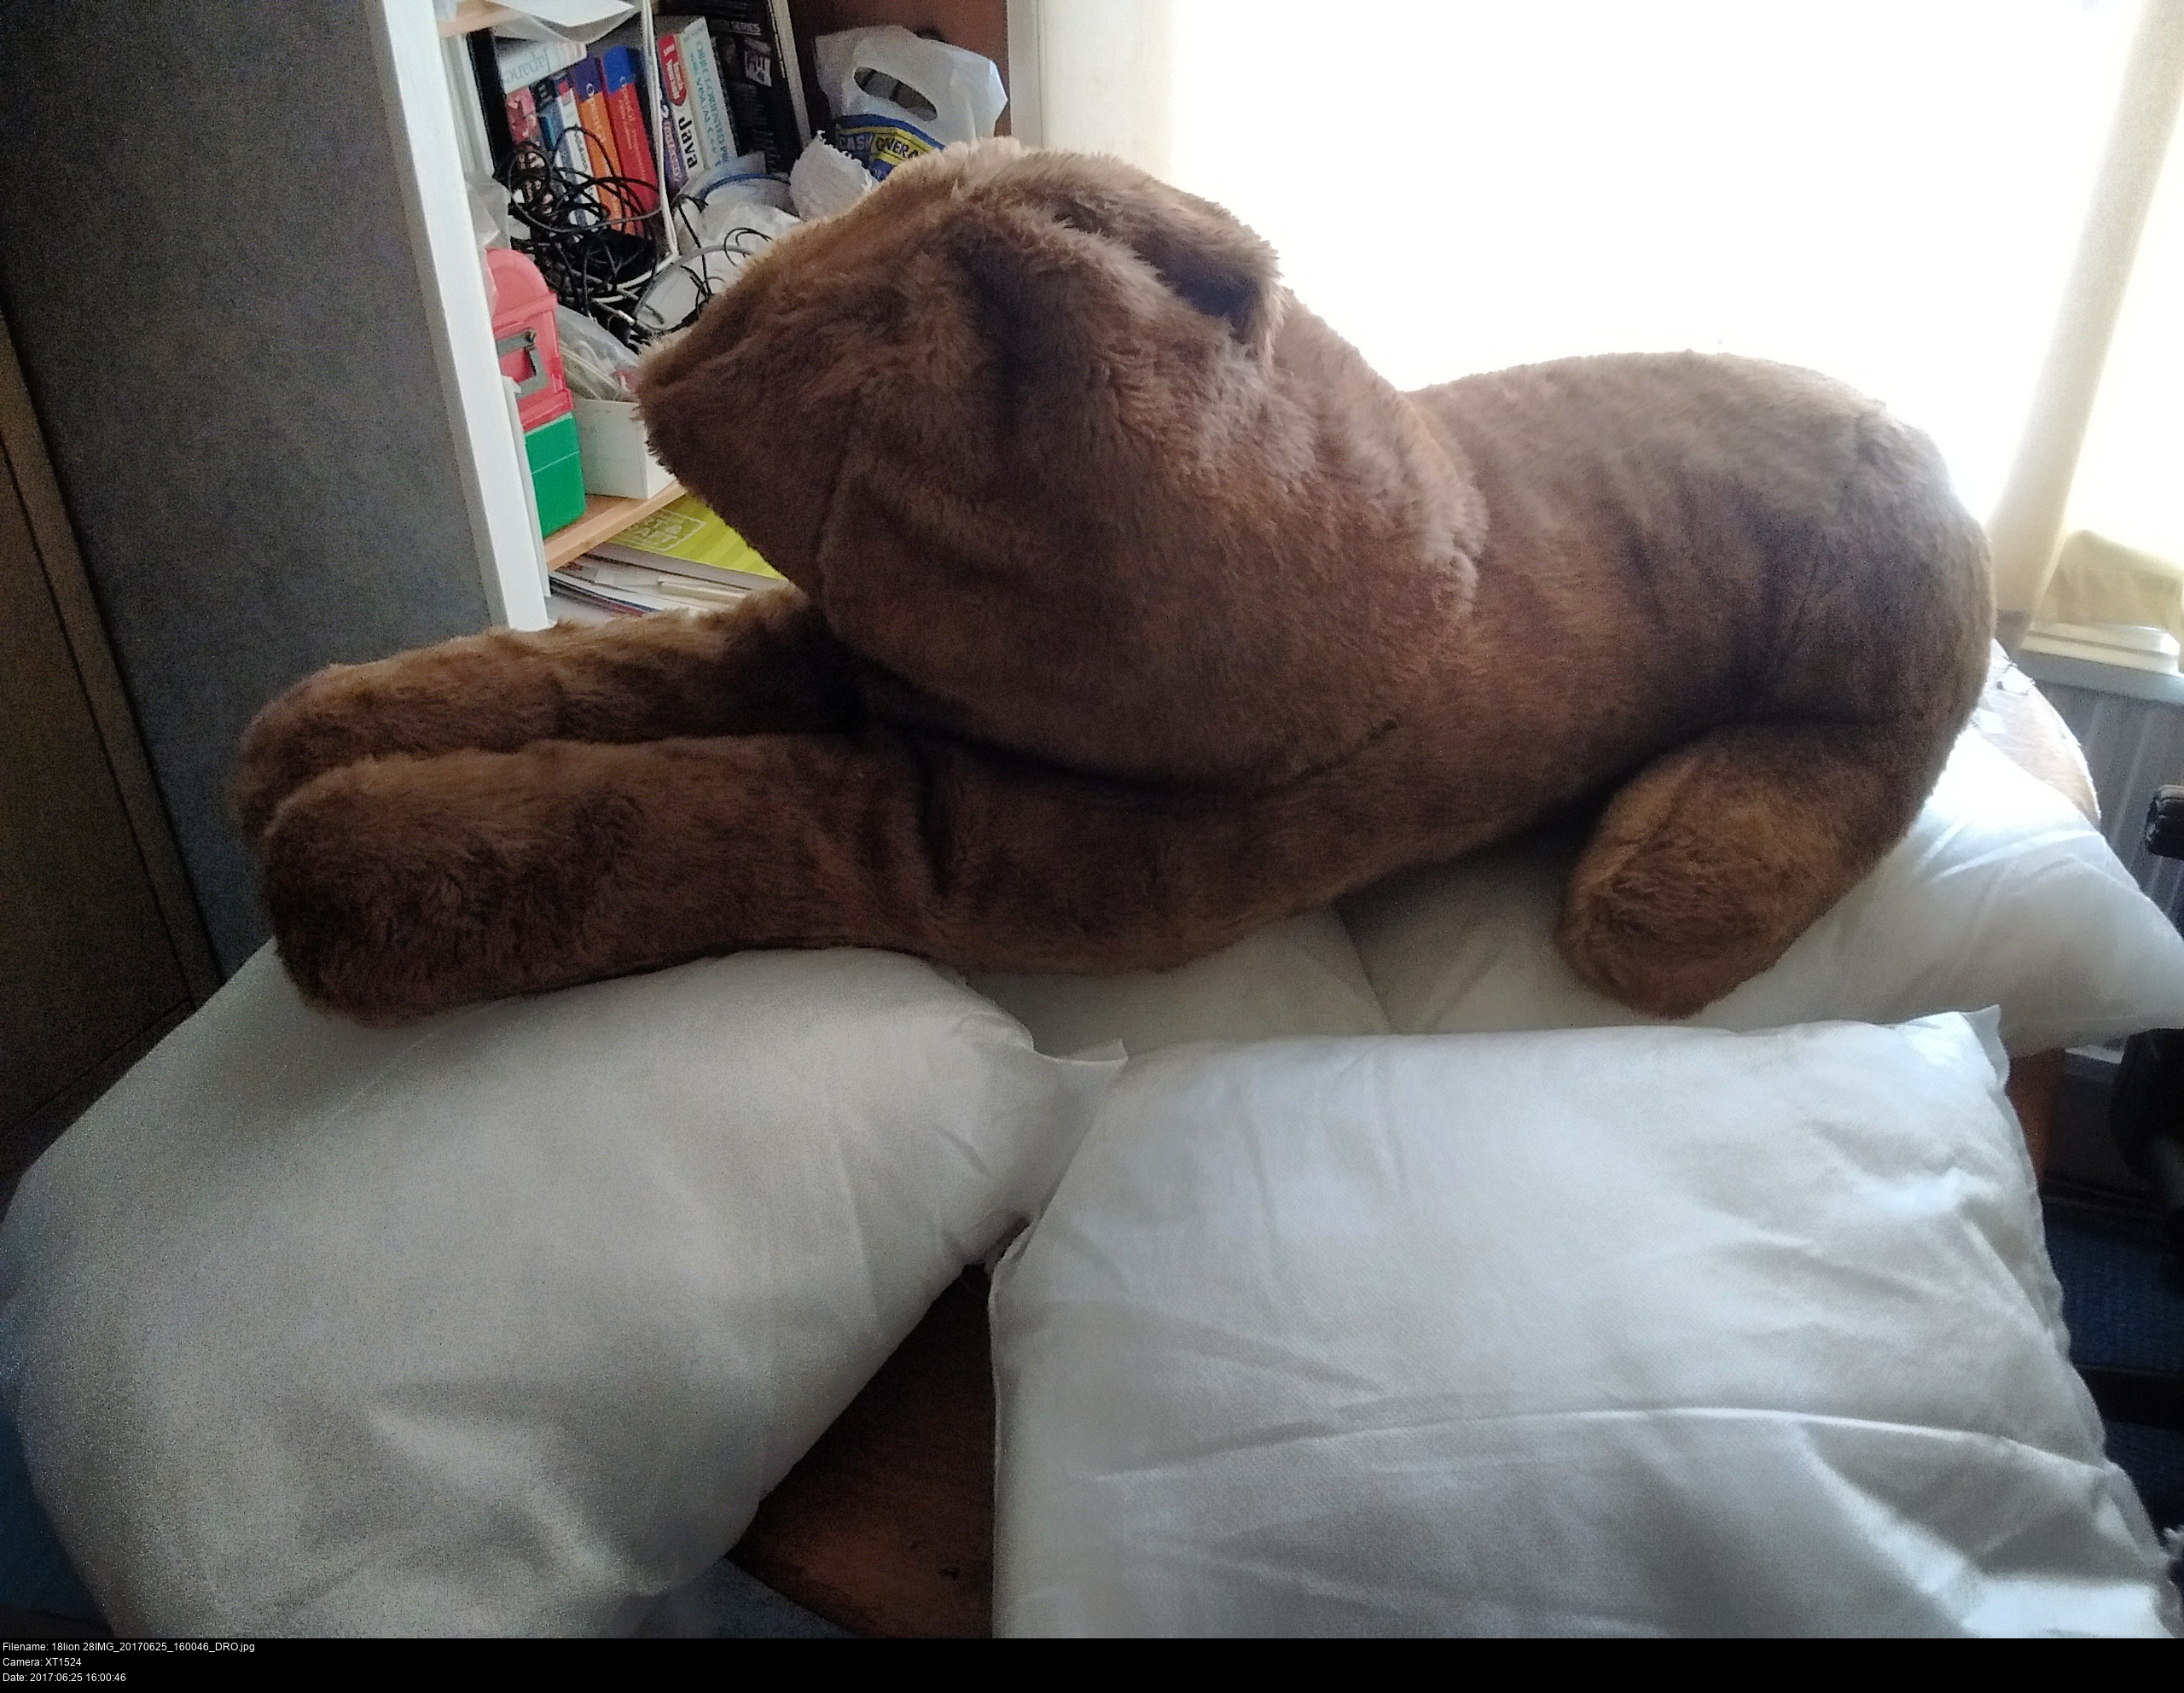
Leo the friendly Lion is more than just a toy to sit on and hug; at 84cm (33 in) long and 40cm (16 in) high from paw to mane, he will guard your door so well that no draught will ever dare to enter!
Unusually, the book is giving the width of the fabric you need instead of just the length. So all those other patterns and instructions that don't give a width really are just being obtuse for no reason, huh?
Leo and the ladybird are the only two 'sit-upon' toys in the book sadly. But there's nothing stopping you from magnifying the patterns for the little toys into giant form!


Let's get started. First step is to copy all the patterns from the book onto paper. Get your baking paper, greaseproof paper, wallpaper lining paper or A3 paper out!
I had a bunch of large maths exercise books with squared paper pages in storage so I could make this large template with dark lines every 5cm. I can slip it under paper to provide a grid easily. Taping the paper to the template prevents it shifting about as you copy.

Done!
The pieces here are pretty big. I had to tape together multiple sheets of A3 paper a few times to get sheets big enough. That's what the rolls are for!
Notice how I've labelled all the pieces clearly with what piece they are, the fur direction, the seam allowance, notches and darts, and that they're all part of the Leo the Laughing Lion pattern.

The material I'm using here is some short pile soft tan coloured fur I bought some time after making Hotshot's head. (I'm fairly sure that's the case. I don't remember having it at the time I made his muzzle, and it would have been the wrong colour anyway.)
It's incredibly soft to the touch; I've been keeping aside for the perfect toy to make. (It's not a great choice for that, I should warn you. If you're making toys and you don't want the seams to be very visible, then make it out of fur with a longer pile and then shave it down to the correct length.)
I'm marking it with a black permanent marker since the backing material is pretty thick. I'm not worried about it bleeding through, since the cut edges will be buried within the seams of the toy anyway. It might come through if I wash the lion's fabric, but I doubt it. Remember to cut fur with the appropriate tool. I've got a whole collection of disposable knives to hand for this: cut lightly on the backing side with a sharp blade, after brushing the fur aside so you avoid cutting the fur itself as much as you can.

There we go: one lion, as promised.
What? What do you mean it doesn't look like a lion? Fiiiiine...


These wing-shaped pieces are the sides of the front of the head. They join together with a gusset piece between them to form the front of the muzzle. I think.
If you're at all unsure, you'd better pin the pieces together and see what it becomes!
It looks like an animal face alright! It kinda looks a lot like a camel actually.

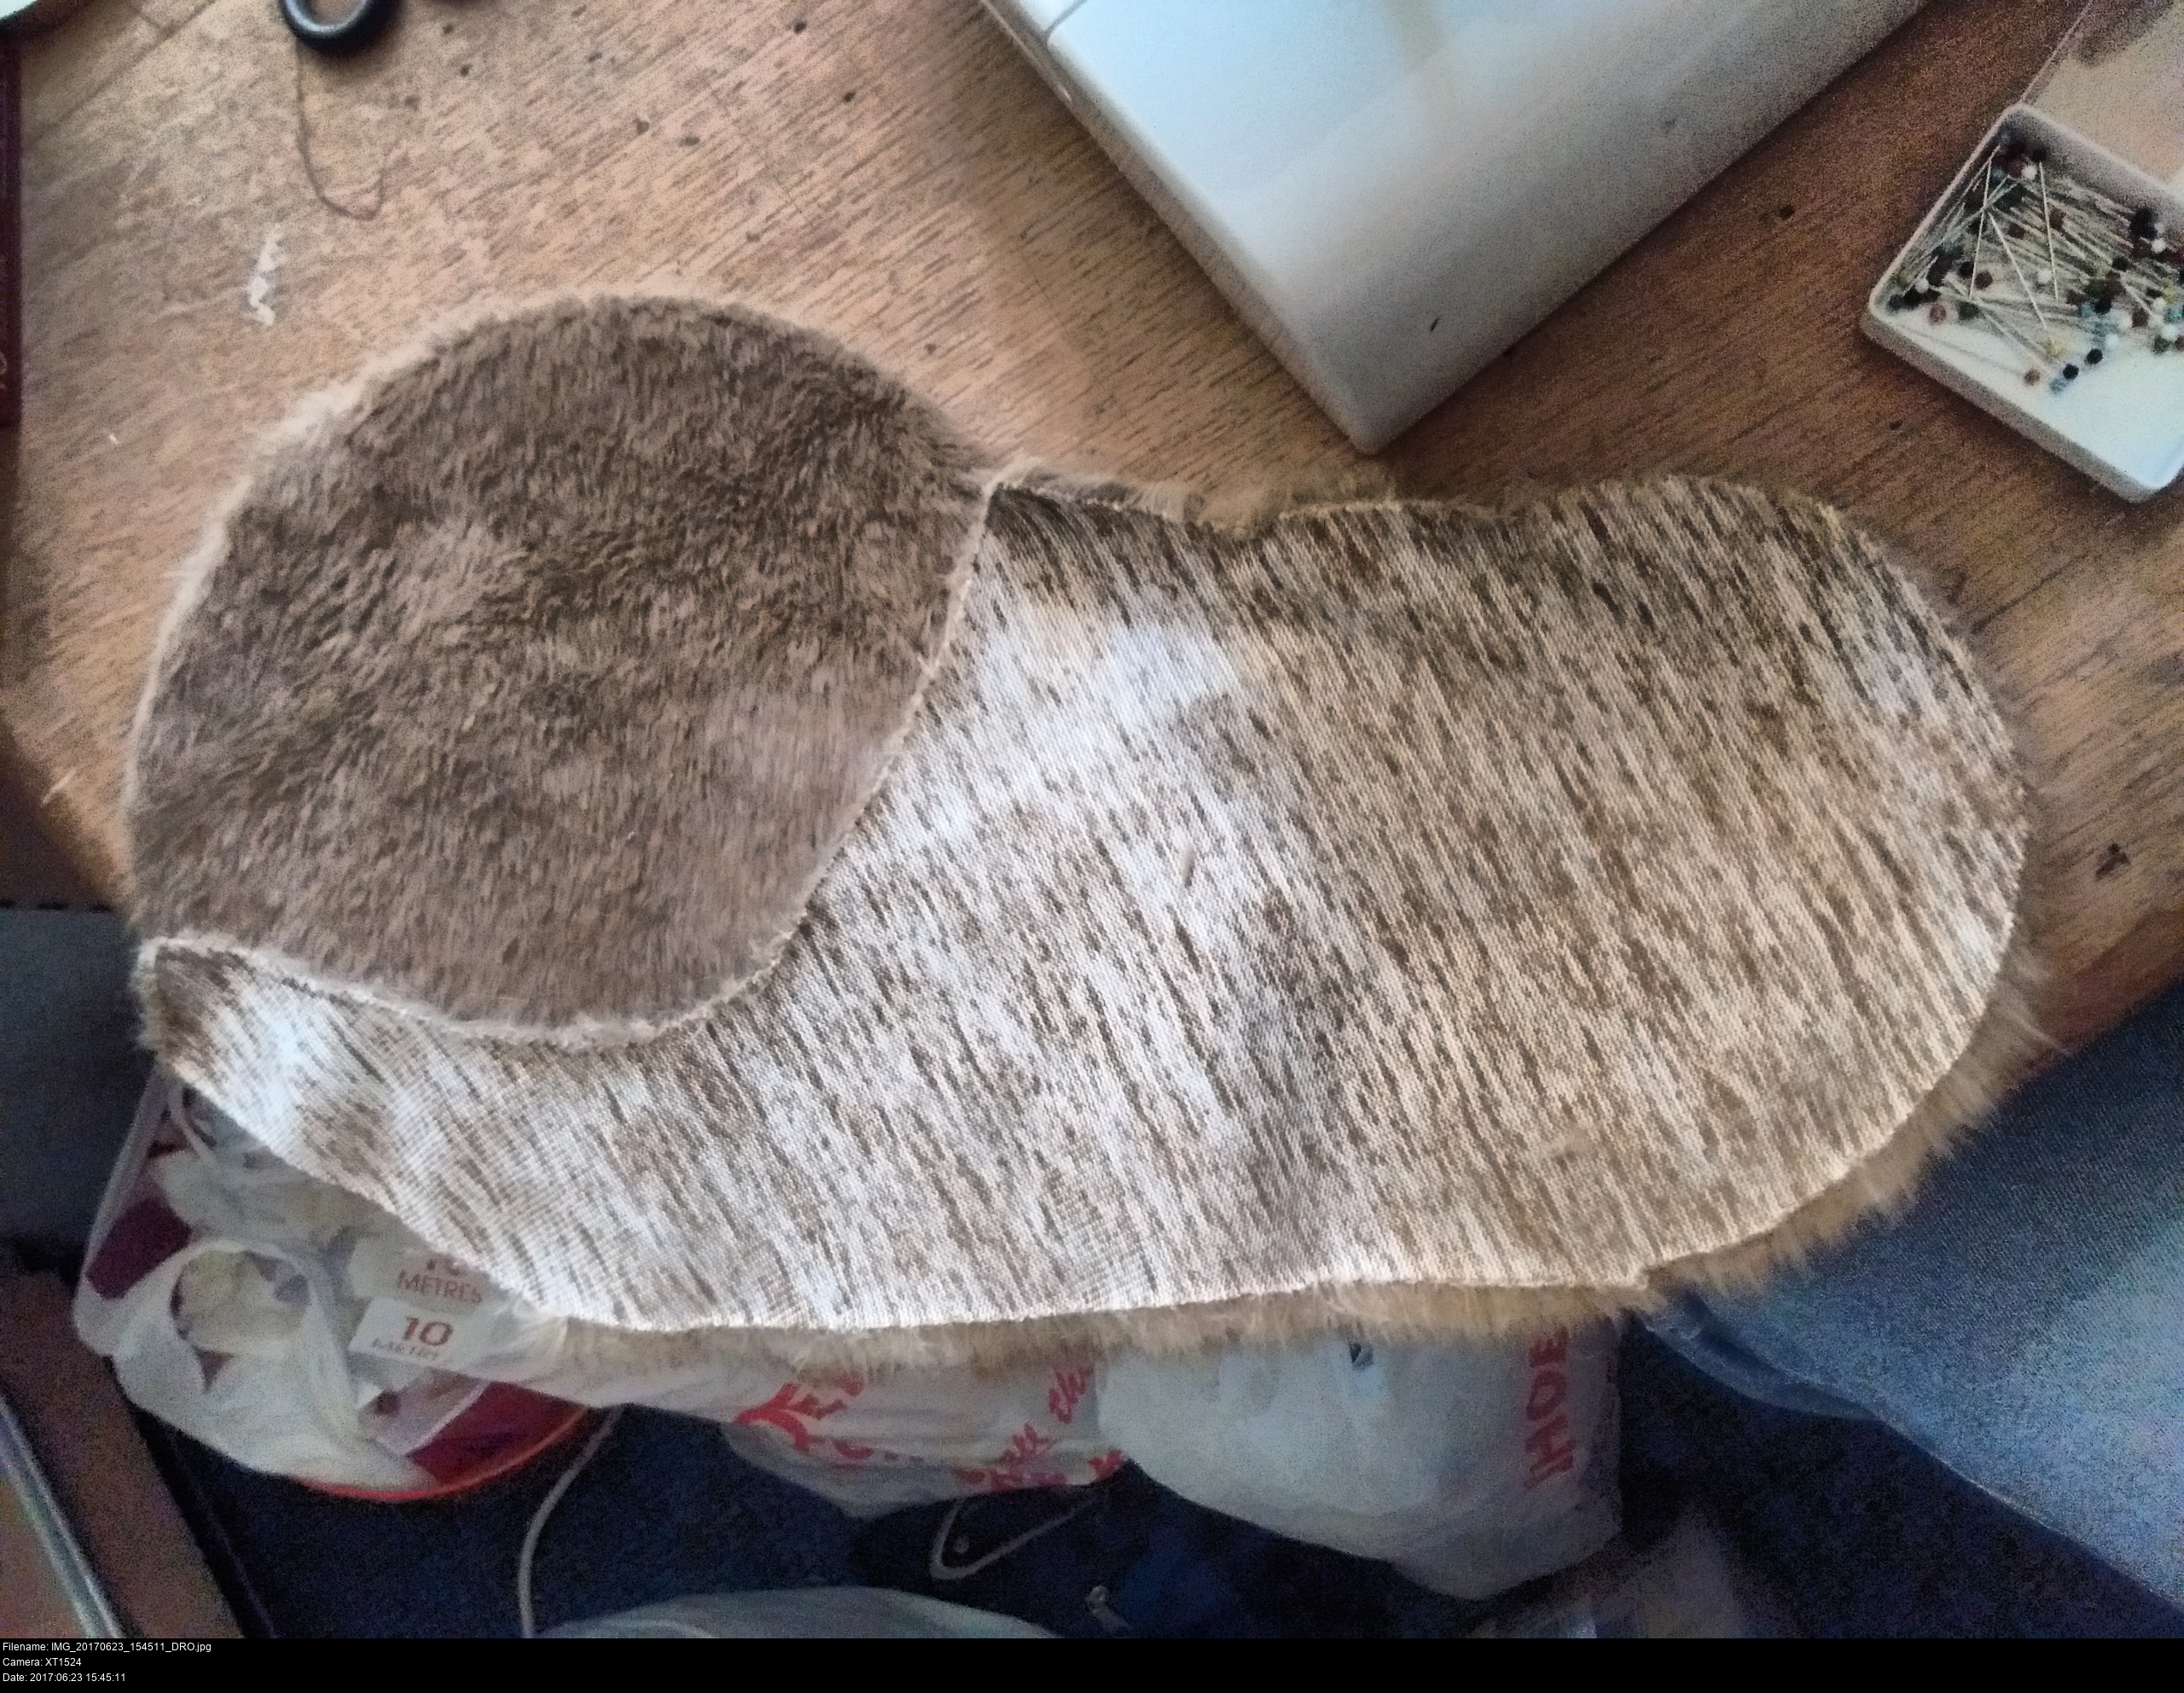
The body of the lion is made of two of these super long pieces that look like squished lions from above.
The upper-body version has an oval shaped hole for the head to attach to the body. Drafting a perfect oval isn't something I've had to do before! I think I just did it freehand in the end based on the measurements I wanted for the hole. You only have to draw a quarter of the oval correctly anyway (fold it!). I'm not cutting out the oval out of this paper, I'm keeping it as a separate pattern piece that I can use to mark the oval on the final material instead. I have to make sure it's perfectly placed if I do that though: draw notches or markings so things continue to line up!
The lower-body version has a large dart running down its middle to give the lion a bit of rounded squish (as far as I can tell). That's marked as the elongated capsule running off to the right of the image. The top and bottom edges of that capsule are to be sewn together.
There are ways to do it mathematically, and here's a tutorial on how to do it with compasses.
http://lumberjocks.com/projects/37524


I've sewn on the head back pieces onto the head front to create the complete lion head, and I've sewn that bundle onto the body. The back of the lion head isn't completely sewn since this is the opening for the stuffing.
There ya go! It's sort of lion-like now!

Here's the underside piece with the large dart sewn in.


The front paws are formed by simply sewing the top and bottom body layers together. Now he's got big pudgy sock-like paws!
The back legs are special:
They're made of two different pieces which I've lain one on top of the other here.
The stitch is made around the outside edge of the leg, starting at the top corner where the two layers meet, and running clockwise around the foot, ending at the second corner where the top layer ends on the left of the image. The large curved area is left unstitched.
This makes a sock shape with a large circular opening which is then sewn to a large curved inset cut in the body pieces.


You can sort of see the large circular stitch on the back legs in these two pictures.


The body was easier than I thought! There's hardly any sewing involved at all.
What's next?

Stuff the lion firmly.


One chunky, sandy, featureless lion. He's very Sphinx-like at the moment!
I'm very pleased with this. It took a whole bundle of cushions to stuff him up.
You can see the back leg seams most clearly around 17s in this video. He's looking great...
But he's still got no tail... Poor lad!
Let's get st...

That's fab. That's also fab.
Either I've suddenly become the Incredible Hulk, or this sewing machine is being A Dick.

Dick. DICK.
This Singer Tradition sewing machine is a DICK.
Meanwhile, several days later...

Would you believe he's still not stuffed enough! He's going to need a little more, and then I'm going to need a boatload for his tail too!
Where is his tail anyway? There it is!
The tail is made out of two pieces of the short fur just like the body.
The brush is sewn on after the tail has been constructed and stuffed fully: after making the long-furred tail brush piece, you carefully take this pocket of long fur, tuck the rough edge inwards, and ladder stitch it onto the blunt tip of the short-furred tail very, very carefully! Make sure everything is super secure, tugging every stitch taut as you go. You don't want Leo's tail getting pulled off into pieces. The tail itself is ladder stitched on to the lion's bum after the tail has been sewn and stuffed and brushed.

Leo has to live in these bags for now because I'm off to MCM Manchester with Skull Kid and Hotshot!
They'll keep the dust off him. I just hope I don't forget that he's living on my desk when I come back with bags full of useless con stuff that needs somewhere to live!
He is one chunky gentleman! Every cubic inch filled with that lush new stuffing, pushed right down into all his extremeties. Use the shaft of a long, clean, unused paintbrush to push all the fluff right down inside.

When you're satisfied, ladder stitch that seam in the back of his head right up.
Now he's got his tail on! Another couple of laps of slow, steady ladder stitching. I had to do some gymnastics to get everything steady enough to work on: leaning things on my lap, my knees, the table to stop the heavy pieces flopping about the place.
Let's poke his ears on with pins and see how he's looking!
Awesome! He's kind of like a spooky ghost lion now!
The ears are two layers sewn together. I have to position them, then ladder stitch them. And... I have to ladder stitch the mane on somehow too. I don't know how I'm going to get that done at all. The long pile fur isn't super great to work with. I managed to ladder stitch on Hotshot's neck, but accuracy wasn't critical there. Here, the stitch is going to dictate the shape of the mane's edge against the head.


I had to manhandle him quite a bit to fit the mane on. His head needs squishing back into shape (which means that he possibly needs even more stuffing!) and his body fur definitely needs a brush.
And he definitely needs a face. But before I can do the face, I need to attach the mane at last, otherwise the face I create will be mangled when I repeat the manhanling (manehandling, perhaps?).
One mane. Probably in the wrong place, but it's neat. I like the look of it gushing all over his shoulders like that. At least I didn't wuss out and glue it so I can unpick it and move it when I've put his face on!
Now how exactly does that face work?

Coloured felt, flat bootlaces. Would you believe that standard black flat bootlaces are so difficult to find?
How do I do the muzzle? Let's consult the book.
Cut nose from black felt and sew it to face.
Let's not consult the book...
It'll look the neatest if I do the mouth muzzle lines first and then cover the centre tip with the nose, so that's what I'll do. Plus with the muzzle lines in place first I can position the nose freely to make the face look the best.
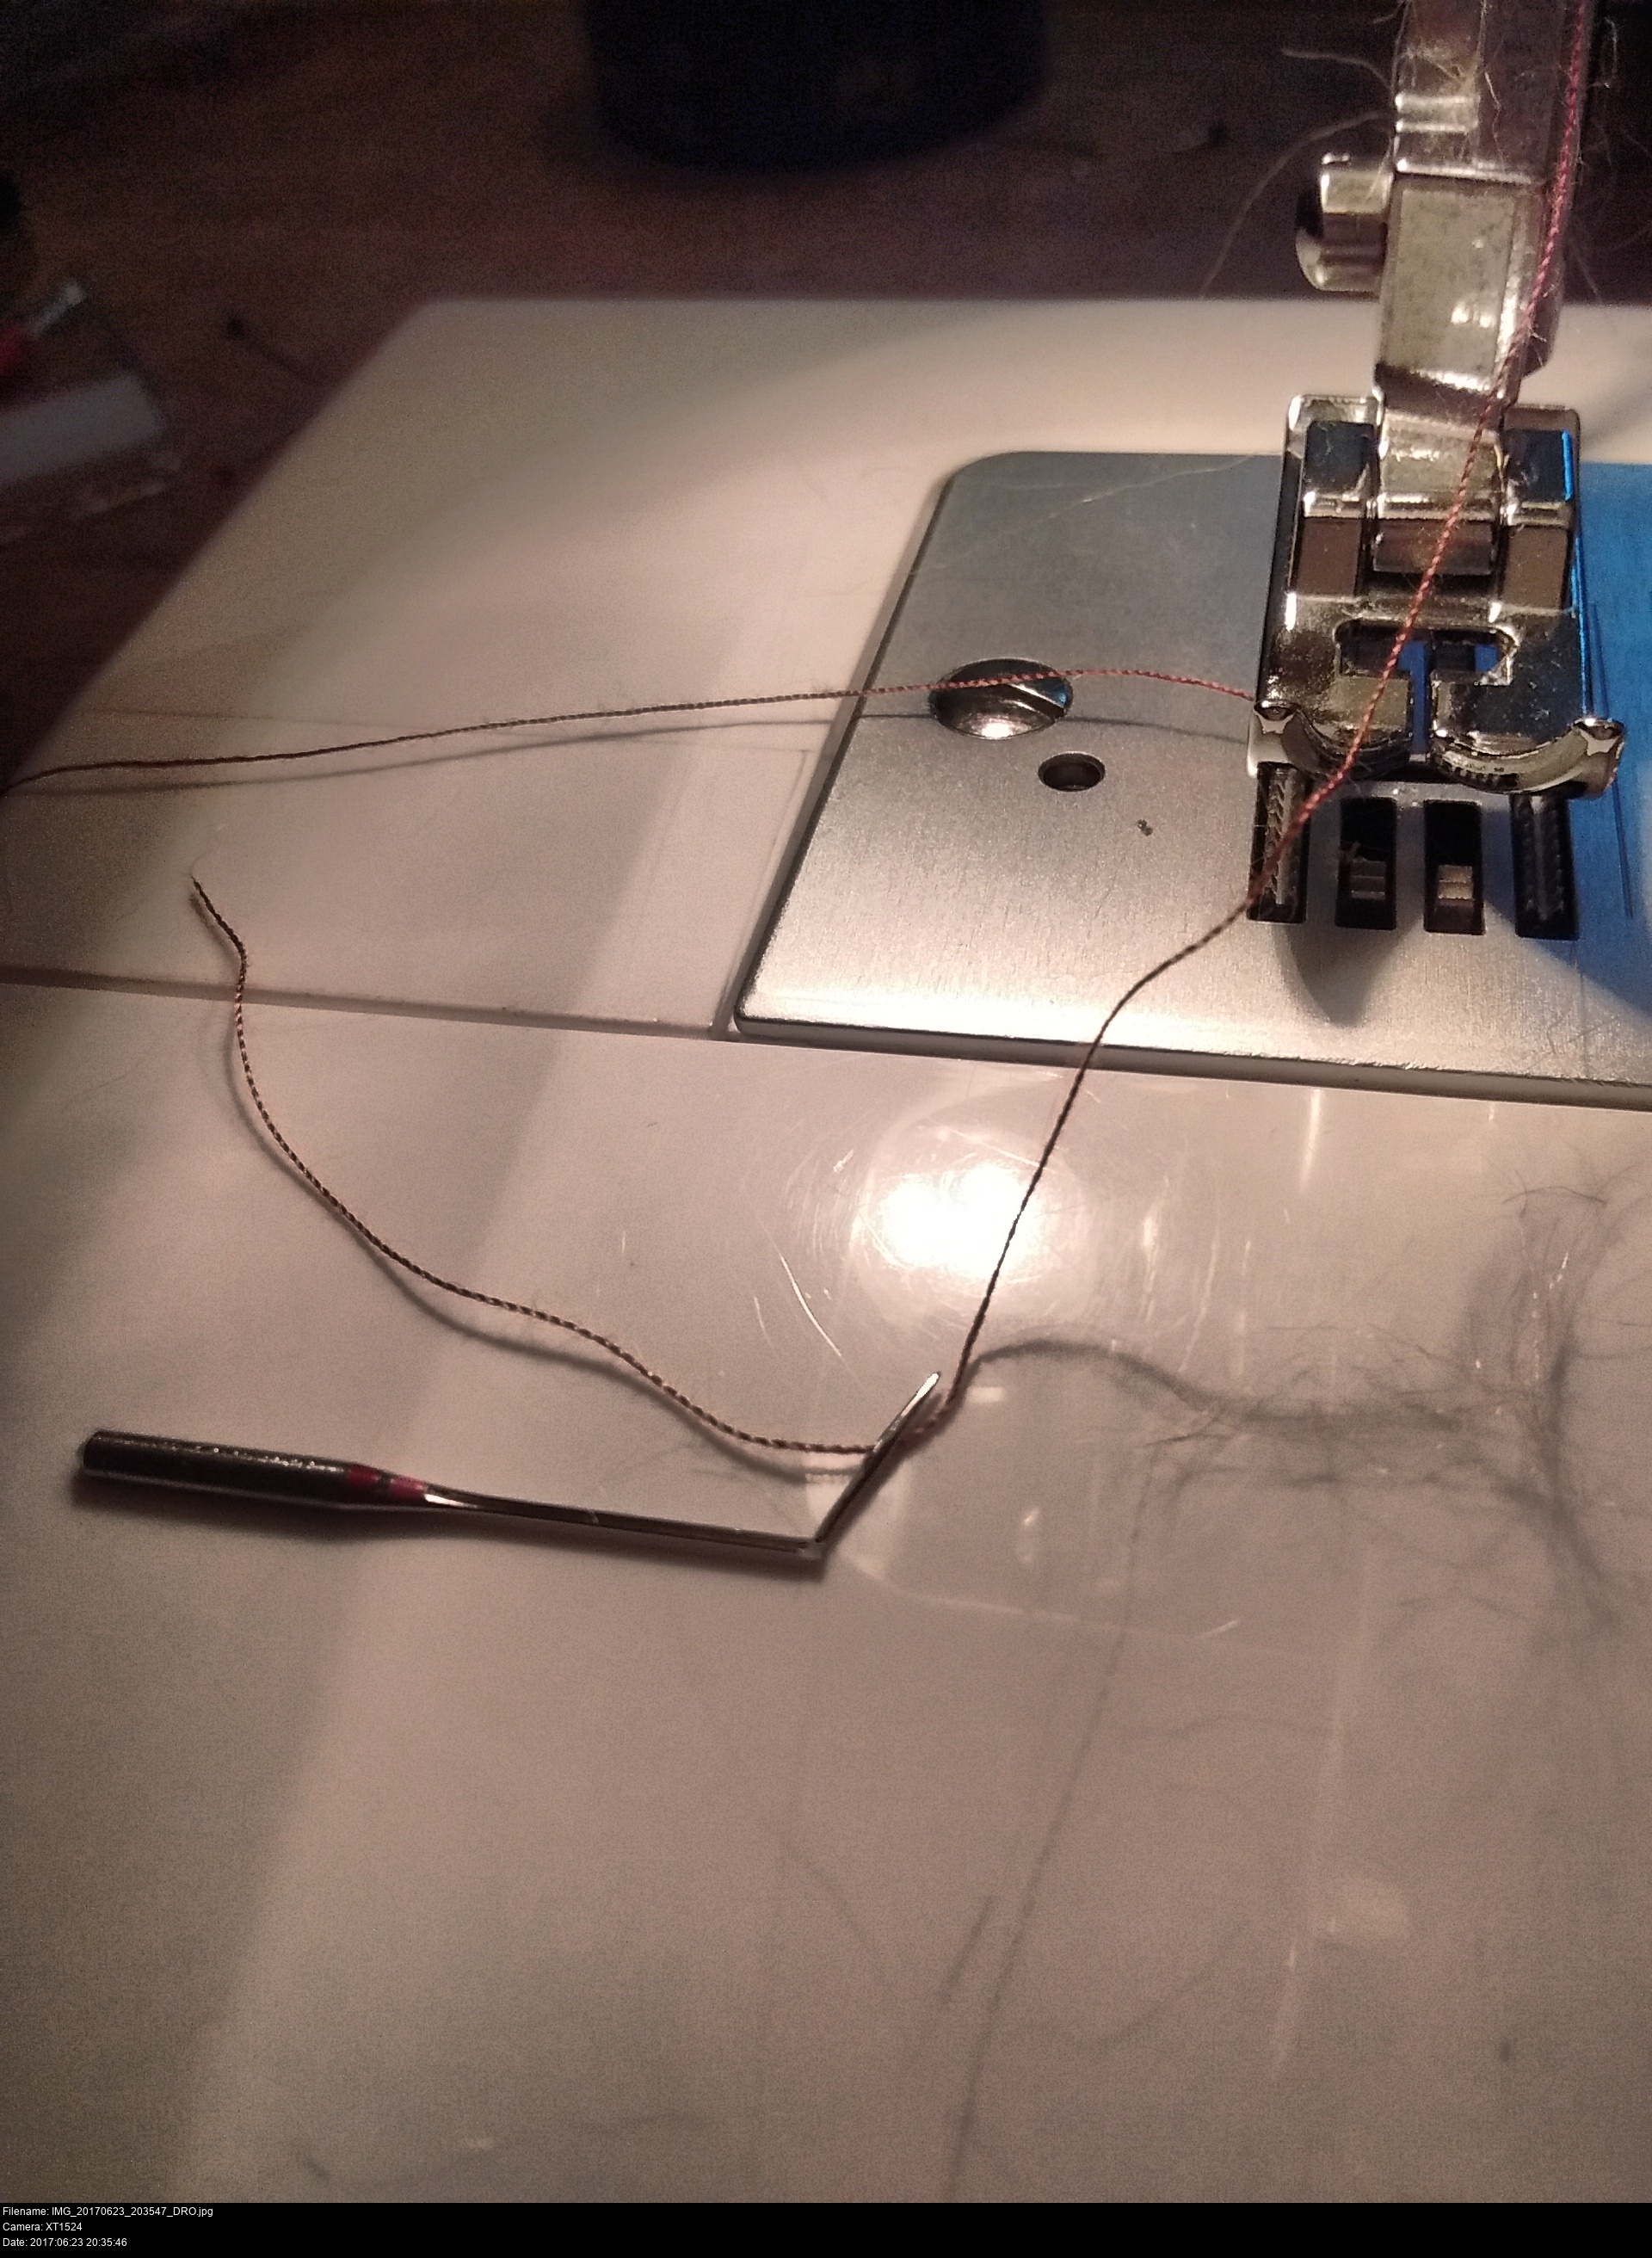
I'm going to use a backstitch for this, like I did with Hotshot's eyebrows. However, I'm not going to try to backstitch around the outside edge of the laces, I'm only going to do one track down the centre of the lace since sewing into the stuffed head is going to be pretty difficult.
It'll take a lot of luck to get the lace curved and stitched on without it becoming creased:
Start at the top of the nose. Backstitch into the fur alone to lock the start.
Backstitch away from you towards the edge of the lace.
Trim and fold the lace to the correct size.
Backstitch over the edge of the lace once or twice (this is like the hook step of an overcast stitch).
Work backstitches down the length of the lace. Tug the lace as you work to ensure that it remains straight and uncreased.
Work out where the line should end.
Trim and fold the lace to the correct size.
Backstitch over the folded lace.
Backstitch back over your existing stitches to lock it in place.
You can take as many goes as you like. Unpick it and start again if you don't like it. Take a photo and draw on it to try out different mouth shapes if you want, or use paper templates with a 3 drawn on.


Awww wow, that's lovely. He looks so wonderfully happy!
I really like how the laces of his mouth are pushing his fur around so his head looks less like a raggedy camel-sock and more rounded like a muzzle ought to.
The nose is a gem-shaped rounded piece of felt that I've overcast stitched. The exact shape of everything isn't super important here, the head is going to deform as I handle it anyway.
Next: this lion needs eyes!


There are designs for the eyes in the pattern but the relative scale of a tiny detail like these eyes is easily messed up.
I'm gonna draw myself some new eyes for Leo!


Paper templates are very silly!
Do I want him to be a smug lion, a happy lion, a frisky lion?
Let's go with ones similar to the original picture. They're so small though...

Here's my eye design. It's built up of three layers of felt joined together with some discreet overcast stitching. It won't be seen except close-up, and it'll hopefully keep the edges from getting frayed. This felt likes to fall into chunks of cloudy fluff as soon as it's given a chance.
Cut the size roughly and then trim it to the correct size after you've sewn it. Sewing small things is awful. Be careful not to cut the layers so that there's some white or blue poking out of the edge of the black. Tilt the scissors in your hand so that you trim the lower layers more severly, leaving the upper layers to cover them.


You sure are one goofy hunk of fluff, aren't you?
He looks a little strange without some shine in his eyes though.


That's it! I love those side photos with his paws all stretched out!
His mane is looking like a right bag of bolts right now. I've got to brush it out with a delicate, firm, slow brush when I'm done, but I'm reluctant to do it until he's completely finished, since I'll just end up pulling all the fibers out of this cheap long-pile fun fur.
To attach the eyes to the face...

Sew eyes to face
You just sew them to the face. Thanks for the assistance.
I think it's overcasting again, like the nose.
Oh Leo, you wonderful, wonderful thing. You're so happy, you cheer me right up. How about I call you Sunny?
The eyes are doing a similar thing to the muzzle's curve - the eyes are looking spherical because they're tugged down to the level of the fur only around the outside edge whereas the inside is free to be pushed out by the trapped fur within.
With the face done I can work on the paw lines. This ought to be dead easy compared to designing and sewing on the entire face!


Here we go with the paw lines. The paw lines are made exactly the same way as the mouth. They're easier since they're straight lines, but that also means I have to make sure that they turn out like straight lines!
Each paw has three lines running down it. It looks to me that they're equally spaced across the thickness of the paw, but you ought to lay out some laces onto the toy itself and shift them around to see what looks nicest.
I'm doing the lines in the middle of the paw first.
Start at the top of the paw. Backstitch into the fur alone to lock the start.
Backstitch away from you towards the edge of the lace.
Trim and fold the lace to the correct size. The lion's fur makes marking out the exact position of the start of the line difficult so you'll just have to do it by eye.
Backstitch over the edge of the lace once or twice (this is like the hook step of an overcast stitch).
Work backstitches down the length of the paw and leading underneath. Tug the lace as you work to ensure that it remains straight.
Work out where the line should end on the underside of the paw.
Trim and fold the lace to the correct size.
Backstitch over the folded lace.
Backstitch back over your existing stitches to lock it in place.
Get a load of these little wiggly paws! How about a handshake!
Alright... yep, poor Sunny needs a mane extension. I don't know how that happened. I think I fitted it into the correct place; it'd be too short if I put it any higher. It's no secret that my sense of proportion is sometimes way off though. It's hardly a critical mess.
I've got to make a new piece of fur that'll fit between the existing hairline and the seam that runs around his head. I can then backstitch it into place just like the first mane piece. The pile of the fur will cover up a lot of my mistakes and blend the two pieces together so it doesn't have to be exact in shape, but the fur direction definitely has to match.


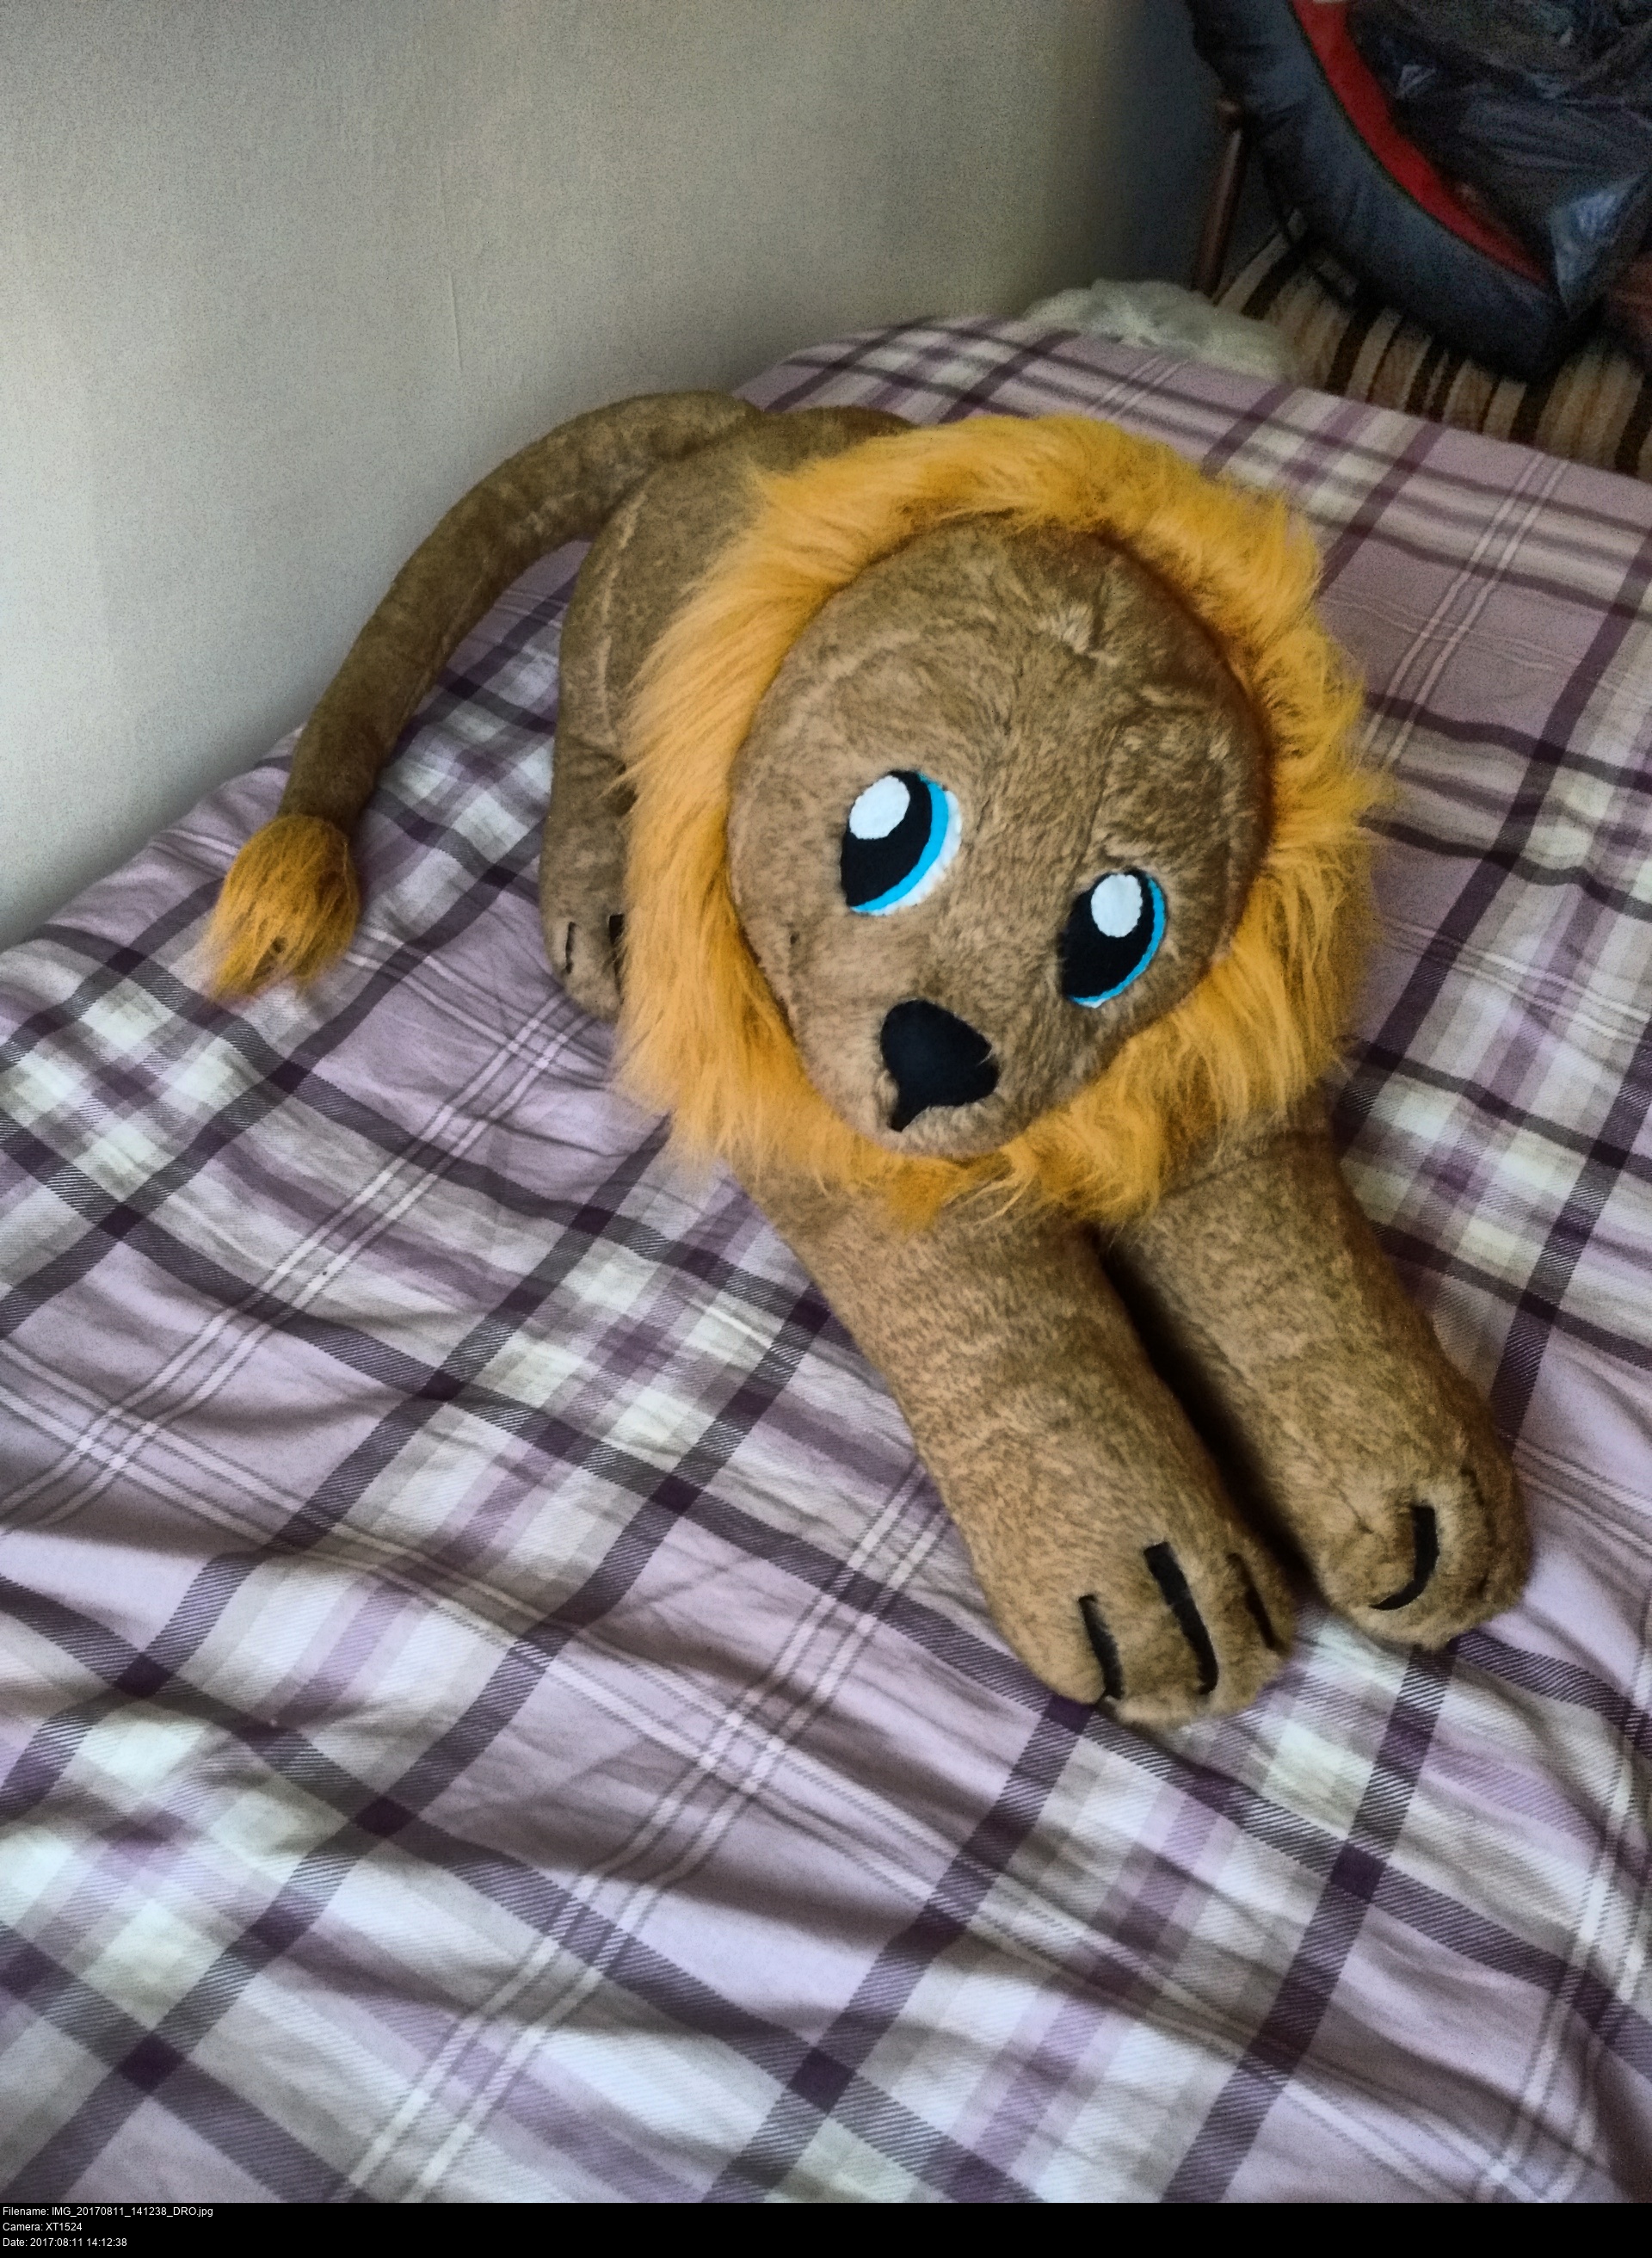
Awww, there we go. That's a lovely lion there!
He even looks somewhat like the picture! His bum seems to be more raised. Possibly I overstuffed him!
He's got his mane extension properly sewn in and the tucked-in hairs brushed back out. The ears were ladder stitched and locked into place with an awful lot of fussing and fiddling and templating to figure out the best place for them. Get a second opinion if you like. (And then be sure to ignore it.)
Make sure to get a nice brush to work with the long fur.
All done!
The last finishing touch I'm going to do is to attach the tail to the body so it isn't flopping about. I'm backstitching an inch or so into the side of the tail, and then backstitching into the side of the body. When the stitches are pulled taut, the tail ought to hug closely to the body, securely, but not permanently.

Roar!
Now where the heck am I going to put a three foot lion??
Written by Matt Carr! mrdictionary.net nonsense.
Questions? E-mail 'em to me, toys@mrdictionary.net!
Twitter @SkullKidUK - Facebook facebook.com/mask.smith.cosplay