


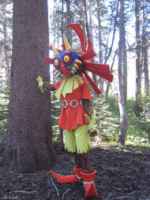



Here's the very first thing I ever made for my Skull Kid costume. It's his tunic! Or, well, it's basically just a big T-shirt really. It's big and it's orange and it's the most basic thing on his costume.
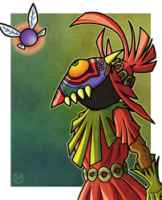
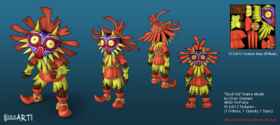
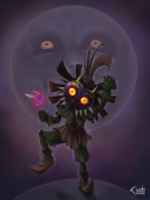
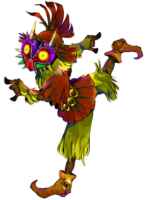
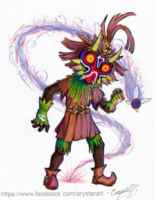
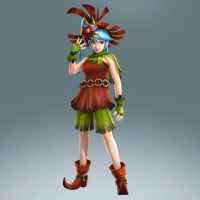
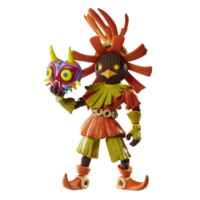
The very first thing you should do when planning out any costume piece (and you are planning it, aren't ya?) is to gather up every single possible picture you can find of the character. It doesn't matter if they're official illustrations, figures, plushies, other cosplays, fan art, or interesting pieces of toast that happen to resemble the character. Once you've got all of these in front of you at once, many things will become clear. So let's try it!
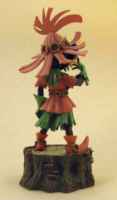
Phew. What can we say about Skull Kid's tunic, then? It's orange. Or perhaps it's brown. It's almost always the same colour as his hat and his boots. If you're a squeaky-clan plastic collectible Skull Kid, it's bright orange and spotless. If you're a manky Skull-Kid-of-the-night, then it's a darker brown, with sodden, torn edges.
Even on the more detailed Skull Kid pictures, the tunic isn't distressed very much. Feel free to make it anything you like. Open it up to a jacket, remove the sleeves and go for a vest. I ain't your mum.
The shoulders of the tunic finish above the elbow and the waist of the tunic ends past the crotch. At Skull Kid's waist, there's a tight belt of rings joined together by yellow or brown cord.
What material is it made of? Cloth. That narrows it down, I guess. Whatever you choose, it has to be soft enough to hang and ripple nicely: watch the shoulder cuffs and waist. The tunic has been made too big for him, and he's holding it clinched with the belt.
We can't see how the tunic is fastened around the neck due to the tabard (that's what I'm going to call the green thing on his shoulders) being in the way. It could be a V neck with eyelets and string, like a villager's tunic, or some other fastener. Because you can't see it, it doesn't really matter what it is: you should make it whatever's more comfortable for you.
There's no special decorations, emblems, stitching, piping, markings or patches anywhere on the tunic: it's completely flat and orange.
This is actually why I picked Skull Kid to make as my first full costume! The clothes are simple, more or less.
For the fabric, I chose the simplest, cheapest fabric I could find. Some polyester from the dress fabric rolls on the top floor of Abakhan Fabrics Liverpool. How much are you supposed to buy? That's why you measure all this stuff out first, silly! I decided to over-buy anyway, buying almost twice as much as I'd figured out I'd need, since I didn't honestly expect my first attempt to work.
So here I've got a big bundle of bright orange polyester and bright green polyester. Boom.
I've never made a T-shirt before. There's a number of things you can try at this point:
Buy a pattern from a sewing/fabric shop. A pattern is a complete set of self-contained sewing instructions contained in a cute little envelope. If you wanted the closest thing to a video game 'use up the item to learn some stuff' power-up, a sewing pattern would be it! In the envelope, you'll get a sheet of very thin paper with all the pieces you need to cut laid out for you, together with a complete set of instructions on what order to put them together. Problem is that they cost money. And money is money, man!
Take a rubbing from an existing T-shirt. This is pretty much what it sounds like: if you lay out an item of clothing you already own flat on a table, you can lay a piece of paper on top and mark out the edges of the different pieces. If you've flattened them out correctly and captured them all, you'll end up with a series of shapes on your paper which ought to be reassembleable into the original garment. And your original item is still intact! You could also dismantle a T-shirt you own to get the pattern pieces. If you've got a T-shirt you hate, or is way past its prime, you could carefully unpick the seams to reveal the original pattern pieces. Then you can trace them onto paper and there you go.
Wing it. Of course, you're not going to do this. You're not going to just draw a shape onto your expensive fabric (or even your cheap muslin) and see what happens. That would be extraordinarily silly. At the very least, you're going to get yourself measured in various places and try to come up with some logical set of rules that fit together to let you draft the final T-shirt pattern. And if you're going to do that, you should probably...
Find some instructions on the internet.
And that's what I did. :)
http://madmim.com/drafting-a-tee-pattern-from-measurements-stretch-yourself/
http://web.archive.org/*/madmim.com/drafting-a-tee-pattern-from-measurements-stretch-yourself/
I wanted the tunic to hang a little looser than the snug fit shown in the images on the website, so I took a whole bunch of liberties with the measurements as I took them, making sure they all stayed internally consistent so the sleeves still fit onto the torso.
The sleeves were made longer, the T-shirt itself was made longer. I also expanded the lower circumference while bringing the waist in a little to give the tunic a slight hourglass shape. Didn't end up being very pronounced to be honest. In fact, it might've been better to do the opposite and make the waist wider so that when I wore the belt there was so much excess material it was forced into the ruffled shape.
If you're wondering where I found such a wonderfully large piece of paper, it's a roll of wallpaper lining paper from a pound shop. You could also use some cheap kids' art paper, anything that'll take a pencil! Baking paper a.k.a. greaseproof paper is good too.
I've made the full symmetrical tunic as a single pattern piece, which I suppose was a weird choice. You might have better luck only drafting out one half of a symmetrical pattern and flipping it horizontally when you're copying it onto the fabric. I've done both ways since.
Don't try to measure yourself. You're going to be bending around all over the place trying to reach. It's just not going to work!
I've got a vest! Now I need to attach some sleeves to it. That part's really simple! Power through all the unusual words and just keep in your head how you -think- the pieces should go together.
I bought some expensive-looking thread from Abakhan and was totally ripped off. And then I ran out and had to get some more.
Definitely never underestimate the amount of thread you're going to use. You're going to use a heck of a lot. And when you go to buy thread, make sure to take a swatch of fabric with you. Nowadays I get my threads for a quid for a mondo kilometre from Calico Laine.
Here's how my tunic looks after the first batch of sewing. It's the right shape, who can say about the length? That doesn't matter for now. We can always go shorter!
The front and the back of the tunic are identical. You might not be able to tell it from the pictures, but I did intend to make either the front or the back a little less wide to give it a bit more shape. I can't remember which way round that technique's supposed to go. In the end, I just wrote 'FRONT' and 'BACK' on the inside of the collar faintly in pencil so I can be consistent.
Can you see the problem with these pictures? I took my (very terrible at the time) phone with me to Abakhan to try to select a fabric that matched the illustration. Looked okay in the shop, but...
The appearance of any fabric is going to change drastically depending on the available light, and, in photographs, the camera, lens, exposure, and film or sensor used. If you want it to look right on stage, you need to emulate the stage conditions. For real life, head into the sun and see what happens. For photographs, pre-pre-post-post processing all over the place.
At this point, I'm just going to cross my fingers and put my faith in the fates.
The only way you'll be sure that any costume piece is correctly fitted to you and the rest of it is to wear the pieces together. I deliberately made the tunic ridiculously long...
-ridiculously long- on purpose, so I could hem it right back up to the proper length. I decided to bring the hem higher than in the illustrations since I'm a six-foot-one tall dude with different proportions to a four-foot forest urchin. You'll have to modify your costumes to fit your proportions too, unless you've got exactly the right figure already.
In these pics, I'm holding up the cuffs and waist to see how it looks in various lengths. You should do the actual modifications last, when you've got all the pieces to compare with. I'm not going to mess with the sleeves until I've got the gloves and the undersuit.
Here's a tabard-in-progress, looking very... blocky and unusual. But you can see where I'm going with it. Everything is going to look a little indistinct and bland until it's finished.
Typically for a T-shirt (I imagine) you'd go for a neat 1/2 inch hem. For this tunic, I decided to go with a one-and-a-half inch hem instead, using the widest decorative zig-zag stitch available. The wide distance between the stitch and the edge of the material contributes to the chibi look, making me look smaller. Plus, a wide zig-zag stitch is easy to unpick if it all goes horribly wrong. One disadvantage of the wide hem is that the already cardboard-like texture of the polyester is even more solid than before.
With the waist hem done, you can see where it'll lie on my body. Probably too high, but when the belt is in place it'll look right.
Oh yeah, the belt!
Skull Kid's belt (as well as the rings on his shoes and hat) look like wooden rings. They could also be wicker rings, or foam, or plastic, or anything that you can get your hands on that looks the part. Making them is possible, but you'll have to make over a dozen of these things and that will get old very fast.
These things go under many different names: curtain rings, bangles, wooden jewellery, and so on. I looked on eBay, local shops, second hand, pound shops, DIY shops I found these guys eventually on AliExpress by looking under the unambitious name 'wooden circle'.
Before you order from AliExpress, be aware that sizes, colours, finishes and materials may vary wildly from what you see. And it'll take weeks from ordering for the iem to reach you. It's a crap shoot, with a very very long chute and you might end up with... something unusable. Good luck!
I'm going to use the larger, unvarnished rings for Skull Kid's belt. I could use the higher-quality, thicker rings, but their pine colour will completely disappear against the orange of the tunic.
At first I used some left-over varnish I found in the shed, which was a really awful idea. It was all chunky and grey and totally the wrong colour. And -somebody who wasn't me- had the bright idea of hanging them up in the shed to dry them. As a result, a whole bunch of them shattered and it was a disaster.
Protip: Never ever let anyone you don't trust come anywhere near your stuff. And never take their advice either. Just don't! But also consider that if your stuff is so fragile that somebody knocking it over or moving it destroys it, it probably wouldn't withstand a convention anyway.
In the end, I used brown acrylic paint to darken them, did a few layers until I got them suitably dark against the tunic. I'm still not sure what the best way to prop up a ring-shaped object to dry is. When it came to varnishing them, I just had at them, hoping to sand away any bubbles or weirdness afterwards. I almost got away with it too, but the reverse side of these rings is a disaster city. The varnish gathered up, forming a milky crust covered in bubbles. I sat there for hours sanding all the whiteness off as carefully as I could, giving each ring at least one good side to let me make a complete belt.
I looked around for some brown garden string to tie the rings together, but I couldn't find anything in the right colour. I could find all kinds of white twine, for gardens and for posting and so on, but I didn't think that dying that darker would be a good idea in case it rubbed off on the tunic.
In the end I went for wool since it was cheap. If it's good enough to knit into clothing, it'll be strong enough to hold some wooden rings together for a little while, right?
Skull Kid's belt is made of these rings joined together with no gaps between them. Measure yourself, try it out, add one ring at a time.
Cut about 4 metres of wool to use.
Wind this wool around a spare cotton spool small enough to pass through a ring.
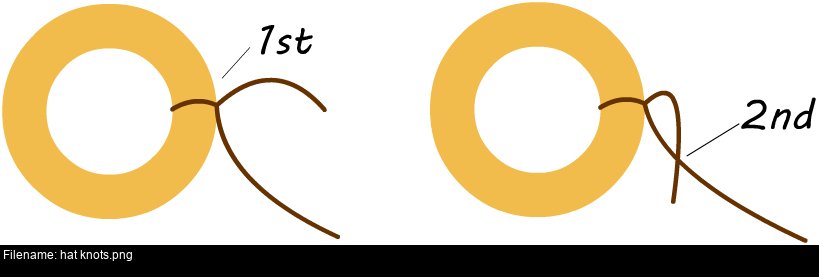
Loop the free end of the wool around a ring, then tie a basic knot like you're tying shoelaces. Tug this knot tight.
Carefully tie a second knot like this, using a needle to coerce it down towards the first knot so they're on top of each other. This should secure the first knot in place.

Pass the spool through the opposite ring to start to bind the rings together. Pass the spool through the ring, around the back then towards you, then through the opposite ring. Create a figure-8 between the two rings, moving steadily upwards. As you go, gradually tug the loops tighter to form a dense mesh.
When you've constructed at least an inch thickness of dense mesh, it's time to create secure the final knot.
Repeat the steps to create the initial knot to make a knot then secure it.
Trim the loose ends of wool outside the knots.
But what about the final link? If you fasten it with wool, you'll end up with a complete circle that you'll have to either lower onto your head or step into!
What I did is to make a simple two inch long piece of back-to-back velcro: fluffy on one side, spiky on the other. If you roll up some of this into a coil, it'll stick to itself. (Some electronics like keyboards and mice come with this kind of thing to protect the cables.) I use one of these fastener strips to close the belt: curl the belt around your waist, fasten it closed in front of you, then rotate the belt so that the velcro fastening is behind you. Nobody can see it, nobody cares. If you were really adamant, you could look for correctly coloured velcro. Or use shoelaces and get -very- good at secure knots! You could make your Skull Kid a little bit more fancy at the cost of accuracy if you had a practical but cute bow of brown shoelaces dead centre. (But my shoelace tying always ends up going soft and loose after a few dozen paces, so I'll leave that method up to you!)
One belt, getting sized up!
Now I can try all the pieces together!
Get somebody else to take pictures of you in your costume as you go. Not only will you be able to see what you look like from another perspective, but you'll be able to get a second opinion!
In the end, my big T-shirt pattern wasn't a whole lot of use since I chopped off almost a foot of the length and quite a lot of the sleeves. If you're going to be Skull Kid yourself, definitely don't use non-stretchy polyester for the tunic!
Polyester has zilch in terms of stretch. Getting into and out of the tunic is a major undertaking! I can sort of wriggle and drop it onto my head, but removing it is something else. Plus it's so horribly artifical that when I do take it off, there's so much static electricity in the air that I can shoot bolts of lightning from my palms. I'm planning to use this ability to defend myself when the demons are unleashed.
I was planning to sew a collar onto it, but I was supremely tired by the time I'd finished making the tunic that all my plans were absolutely terrible and I'm glad somebody stopped me from wrecking the thing trying to add a collar.
Both the tunic and shorts are polyester, so they're very easy to clean and nigh indestructible. They have a tendency to retain creases, so naturally you're going to have to iron them from time to time (Skull Kid is very particular about his appearance!). Even if you're going for a manky Skull Kid, you're going to have to make sure that it's a very meticulously applied mankiness and not just random. A big folded crease is going to look strange in the middle of your rags.
When the conditions are right, the colours are a pretty close match I think. ;)
Written by Matt Carr! mrdictionary.net nonsense.
Questions? E-mail 'em to me, skullkid@mrdictionary.net!
Twitter @SkullKidUK - Facebook facebook.com/mask.smith.cosplay